Setting up an Android device as a customizable virtual controller
Note: this is a beta release of this feature and may contain bugs
With the introduction of virtual controller support in v1.7.0 it is now possible to set-up an android device as a fully customizable virtual controller. This guide will walk you through a basic set-up for this new feature.
1. Install the android application
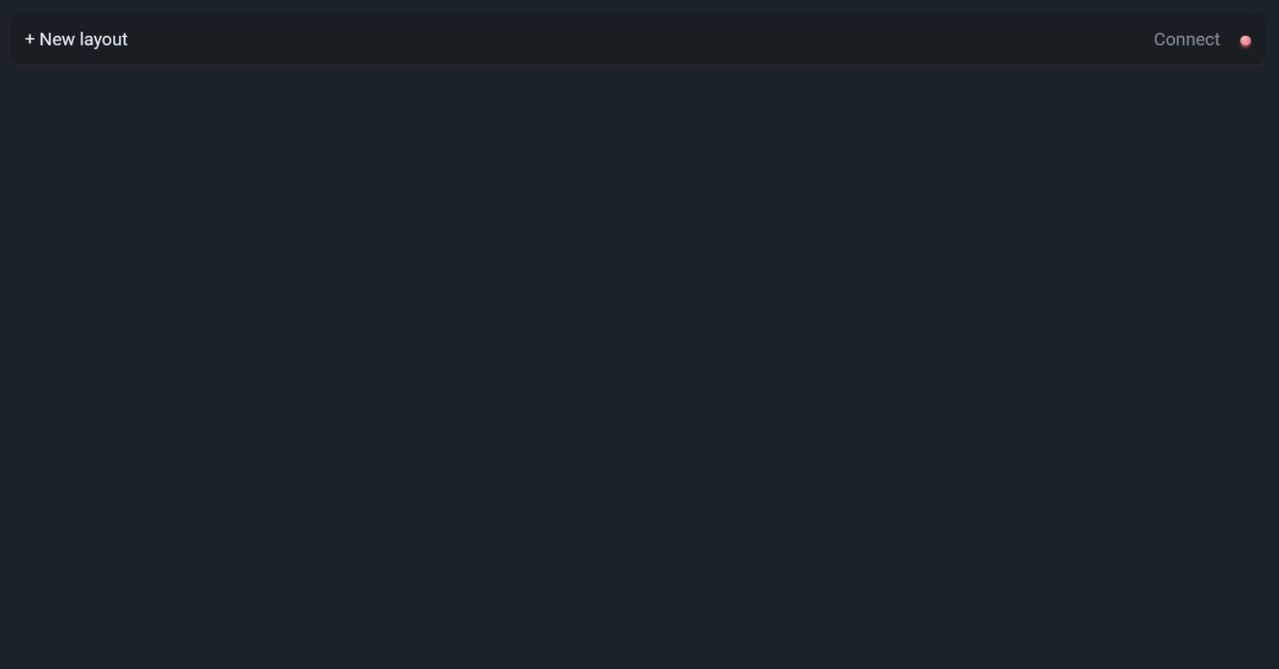
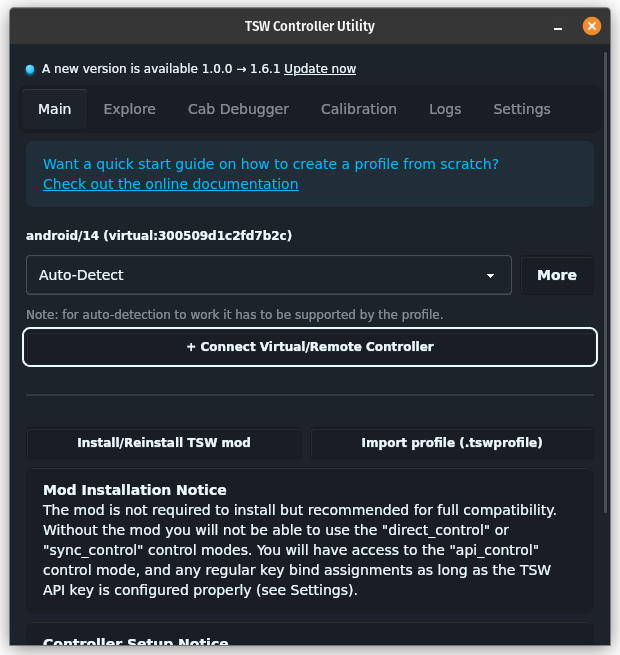
First and foremost you will need the TSW Virtual Controller application for android which can be downloaded from the releases page. At this time only android is supported. Once launched you will see a screen similar to the below example:
2. Set-up your first layout
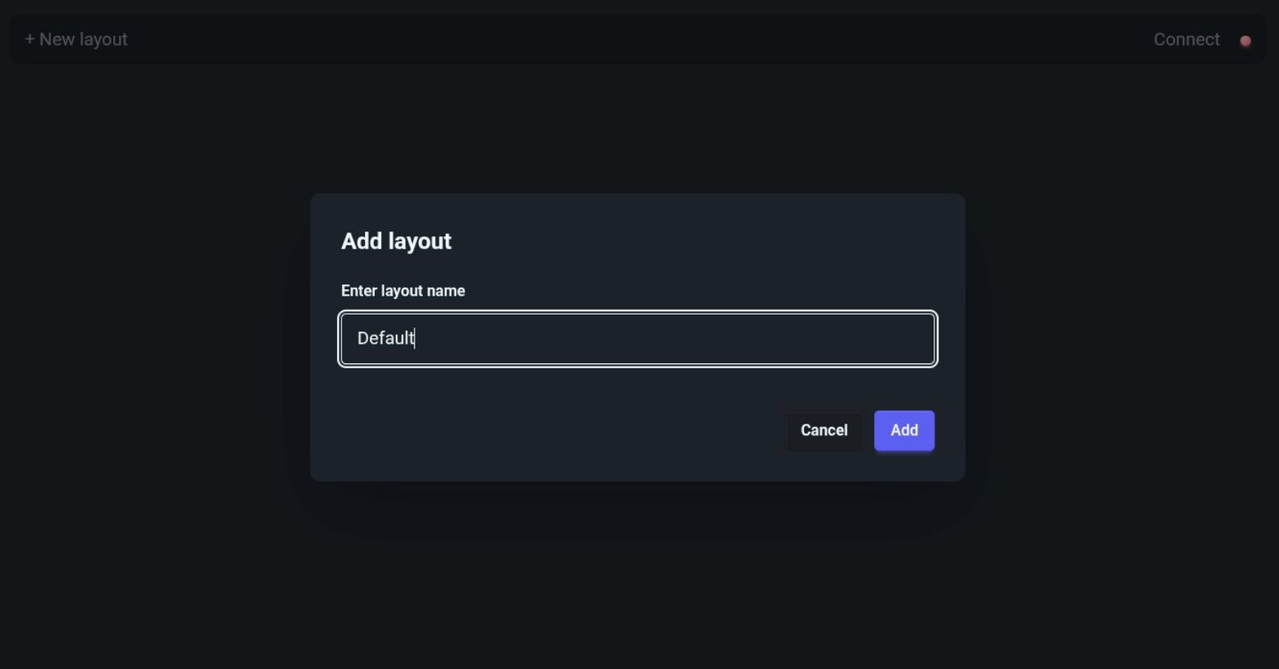
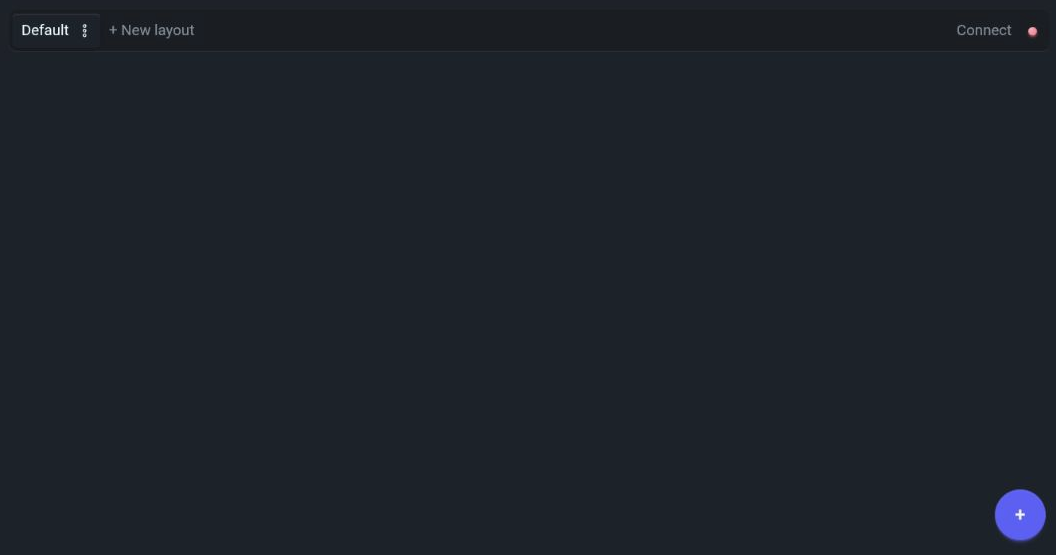
Now you can create your first controller layout. To do so you can click the + New layout button in the top left. You can give it any name; for this guide we will just call it Default. Once created, if not already active, you can select the created layout from the top left to activate it, after which you will see a + button appear in the bottom right
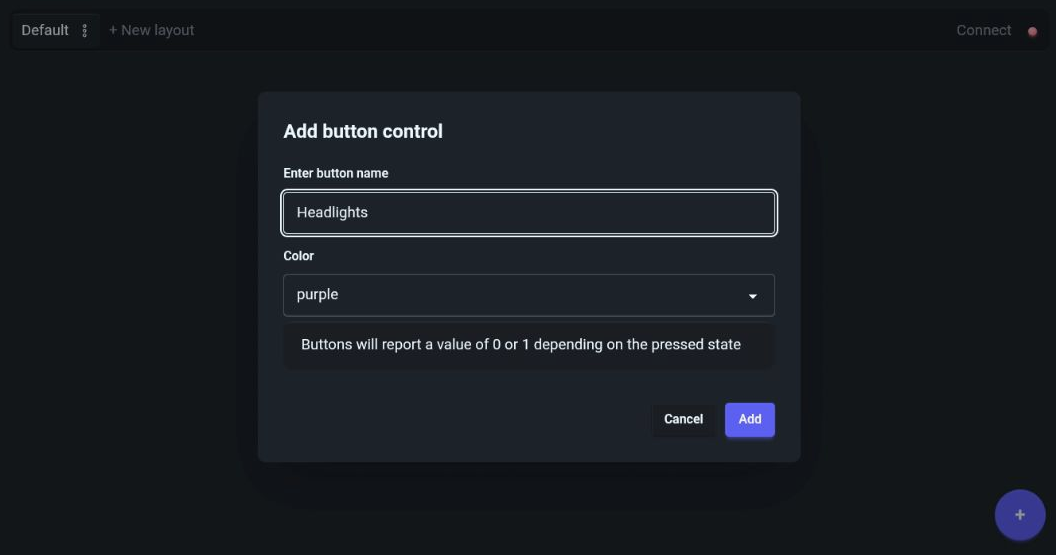
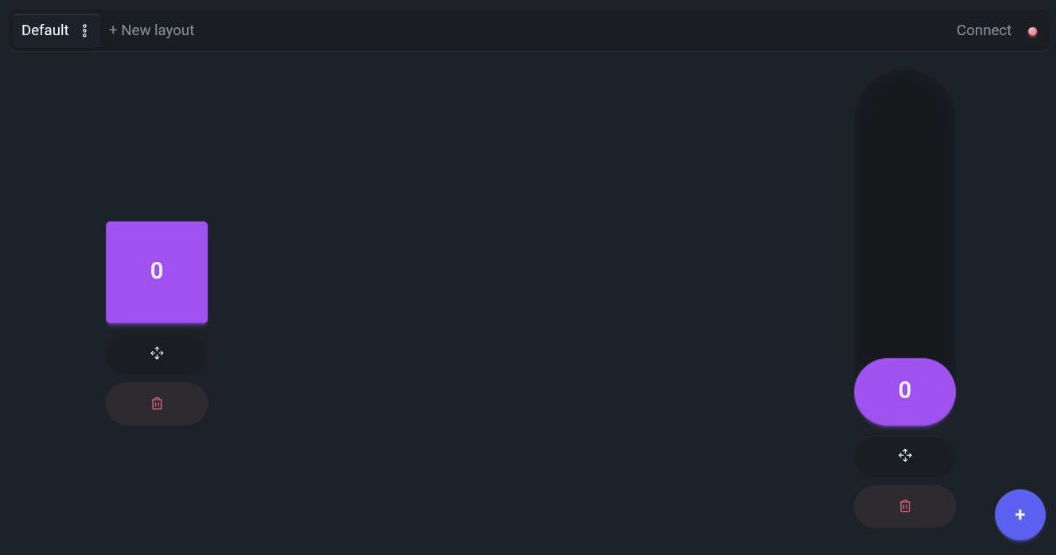
For this guide we will be keeping it simple and set up a button for headlights and a slider to control the independent brake. Let's start by adding the button to our layout by clicking the + in the bottom left and selecting Add button. This will open a form where you can enter the name of the button control, we'll name it Headlights and keep the color as-is.
After adding the button we will also move it to the left-side of the screen by clicking and dragging the move button below the control to the left hand side of the screen. We will do repeat the same step to add a slider named IndependentBrake and move it to the right side of the screen instead.
3. Configuring the profile
I won't go in-depth into setting up profiles in general but generally the controls on the virtual controller act exactly the same as any normal calibrated controller. The names given to the controls on the device act the same as they names you give the controls when calibrating a joystick or gamepad. This means we can simply add an assignment for the Headlights control to trigger the h key and add an additional assignment for the IndependentBrake to use direct_control to control the independent brake (we will be using the HSP46 as an example where the name of the in-cab independent brake is simply called IndependentBrake). The result will look something like this in the profile builder:
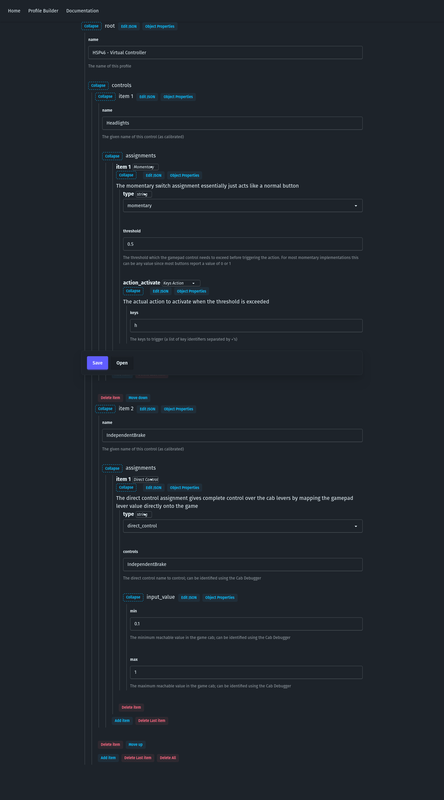
Or as represented in JSON:
{
  "name": "HSP46 - Virtual Controller",
  "controls": [
    {
      "name": "Headlights",
      "assignments": [
        {
          "type": "momentary",
          "threshold": 0.5,
          "action_activate": {
            "keys": "h"
          }
        }
      ]
    },
    {
      "name": "IndependentBrake",
      "assignments": [
        {
          "type": "direct_control",
          "controls": "IndependentBrake",
          "input_value": {
            "min": 0.1,
            "max": 1
          }
        }
      ]
    }
  ]
}
4. Connecting the controller
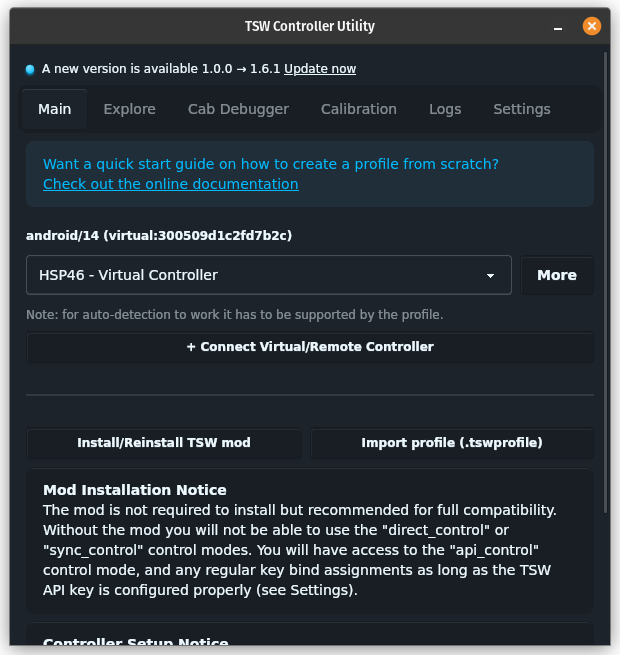
Now we have both the profile and virtual controller configured we can connect the device to the app. Go ahead and open the TSW Controller Utility on your computer and you will see a new button titled + Connect Virtual/Remote Controller. When you click this button a dialog will appear with a QR code which you can scan from the remote device using the Connect action in the top right. This will trigger the camera to open in order to scan the QR code to establish a connection. Once scanned the status bubble in the top right of the remote device should change to green signifying the device is connected and the controller should appear in your controller list.


Since virtual controllers work exactly the same as normal controllers you can go ahead and select the profile you just created from the list.
Note: virtual controllers don't fully support auto-detection
5. Play the game!
This is all that's required to set-up a virtual controller!