Creating a new profile - Quickstart
This is a quickstart guide on how to create a new profile from scratch. We will walk through the steps from calibration to profile creation.
Note: this guide assumes you already have the app fully installed and the controller(s) hidden from the game. (with or without the mod)
Step 1 - Calibrate your controller
Before anything you will need to configure and calibrate your controller. This is important because it defines the names of your physical controls. Through the configuration process you will give them "friendly" names instead of having to work with the internal SDL names like "axis 0" and "axis 1".
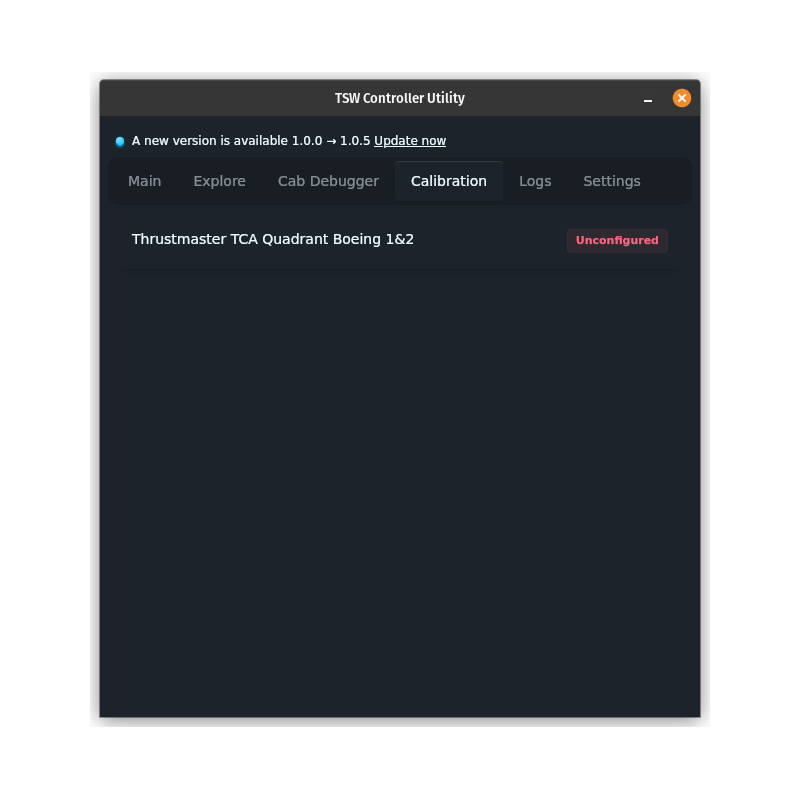
To get started launch the app and switch to the Calibration tab where you will see all your currently connected controllers. If you already configured your controller, great nothing left to do as long as you remember the names you gave each control (if you need to update the configuration you can always re-configure it by pressing the green "Configured" button). If you have not yet configured your controller, like in the image below, you can click the red "Unconfigured" button to start the calibration process
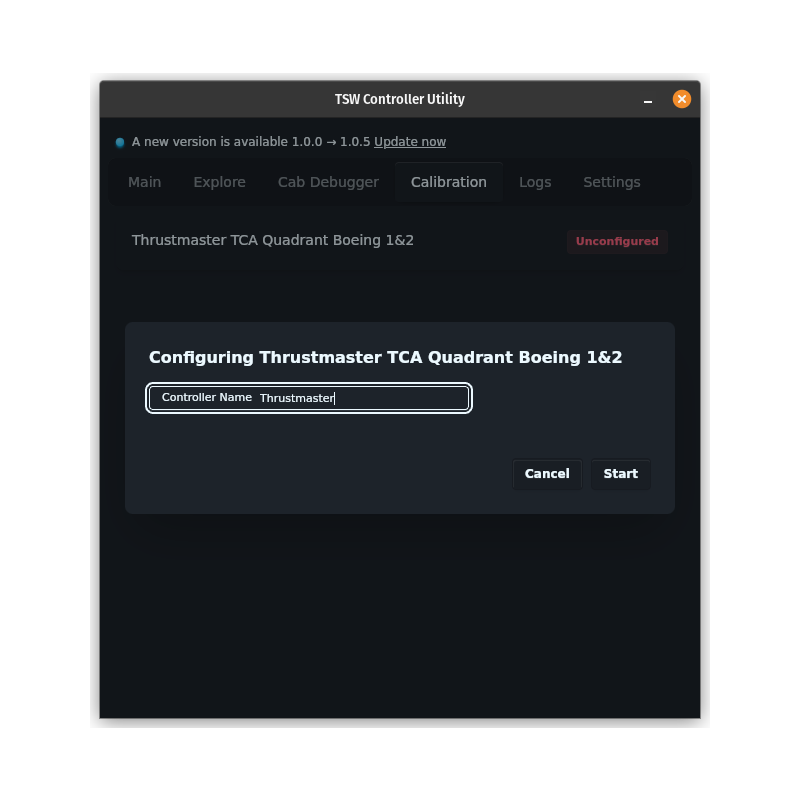
Once you start the calibration process a new modal/dialog will show show up where you can start by giving your controller a friendly name. Once you enter a name you can go ahead and click "Start" to start calibrating each physical control.
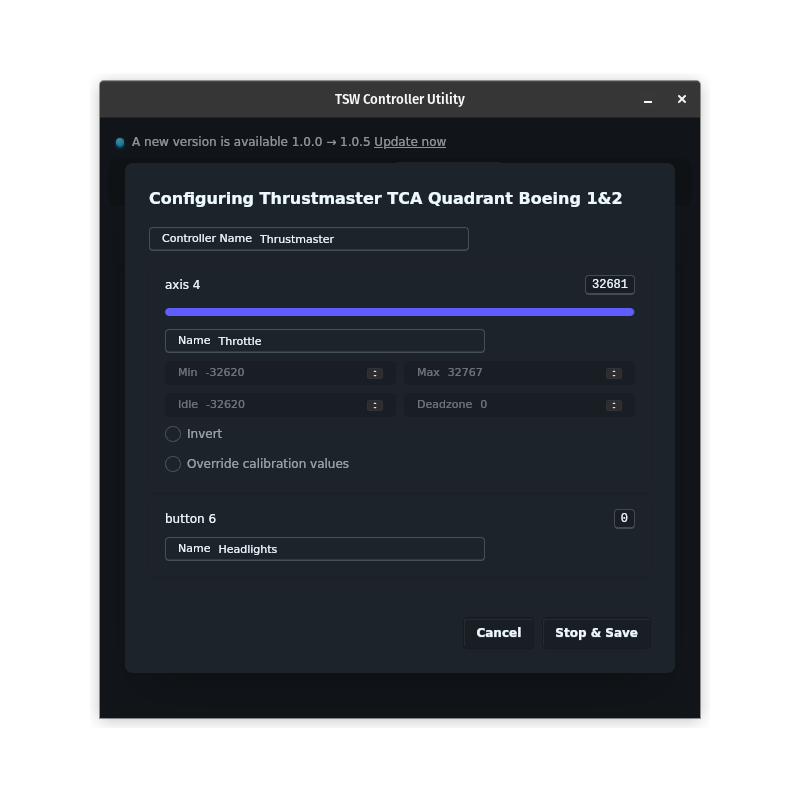
After clicking "Start" the button will change to "Stop & Save", but no other changes will appear in the dialog yet. Each control will only show up when you interact with it, ie when you move a physical lever or click a physical button. You will need to press each button and move each lever from each end of the movemeent range to define it's minimum and maximum values. For each control that shows up you will at least be required to give it a name using the "Name" field. Optionally, you can decide to invert the range and override the lever calibration values where necessary. In the example below, the names are "Throttle" and "Headlights", this can be useful for more generic interopability later, but you can also choose to give them more generic names like "Lever1" and "Button1", whichever suits your needs best.
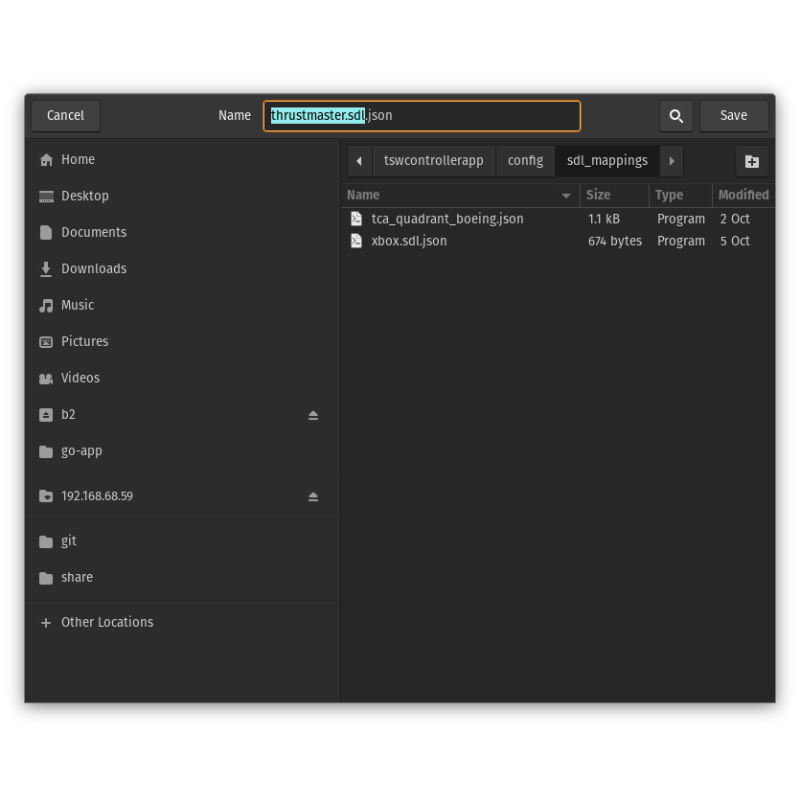
Once you have finished configuring each control you can hit "Stop & Save" which will open up a dialog to save each calibration file. It is important not to change the location of where it is saved (since the app only loads from this location), but you can change the name it is saved as. In this case we will keep both names as they are defaulted. After saving the dialog should close and the listed controller should change to "Configured"
Note: if you are re-configuring a controller make sure to overwrite the existing calibration files or delete the old ones to prevent any inconsistencies
Now we are ready to create a new profile
Step 2 - Starting a new profile
To start a new profile you can either use the profile builder or if you are comfortable with JSON you can use a code editor to create the profile. If you choose to use a code editor you can start with the following empty template:
{
  "$schema": "https://tsw-controller-app.vercel.app/profile-builder/schema.json",
  "name": "",
  "controls": []
}
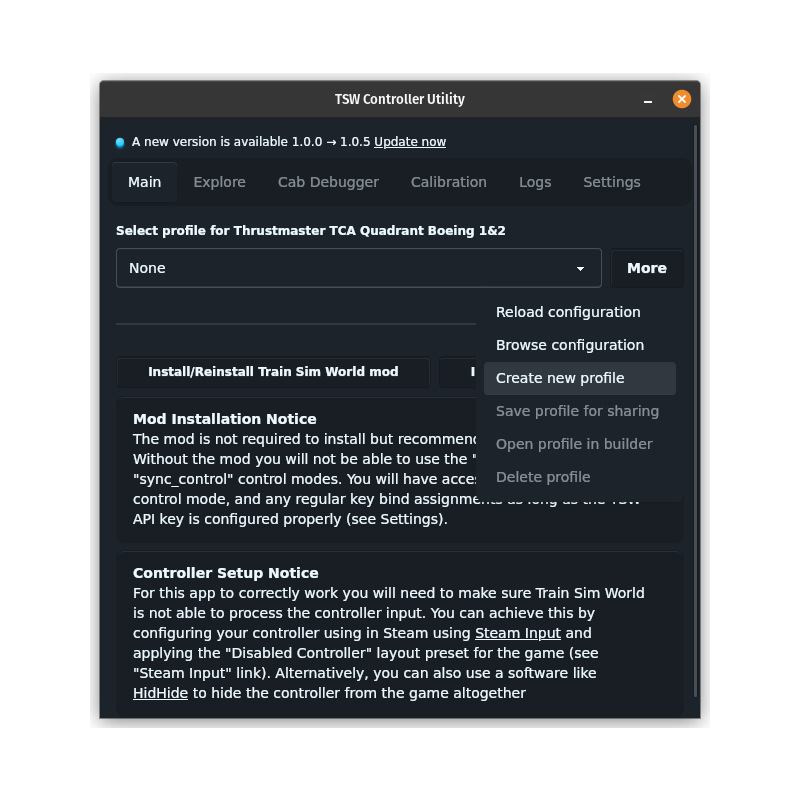
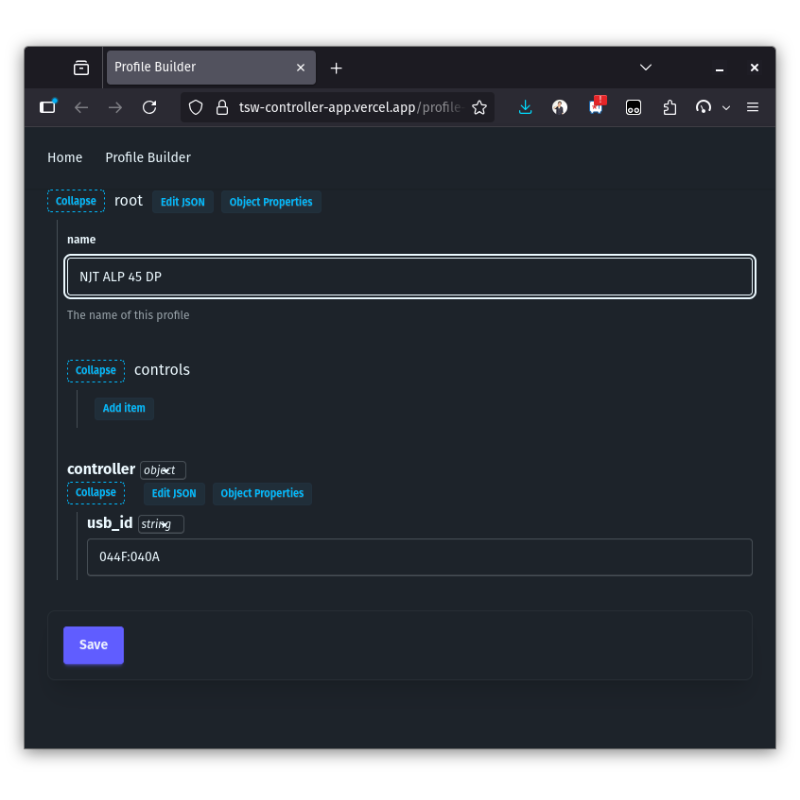
If you choose to use the profile builder you can switch back to the "Main" tab and use the "More" menu next to your controller and select the "Create new profile" option. Alternatively you can always access the profile builder directly through the following link. Once in the profile builder you can start by changing the "name" field to give your new profile a name. For this example, we will it "NJT ALP 45 DP" as that is the locomotive we will be using for this guide
Step 3 - Creating simple assignments
For "simple" keybind assignments such as headlights we don't need to start the game as long as we know how we want those keybinds to behave (of course you can always verify in the game by pressing the keyboard buttons manually). In this example, we will use assign the "H" action to the previously named "Headlights" control.
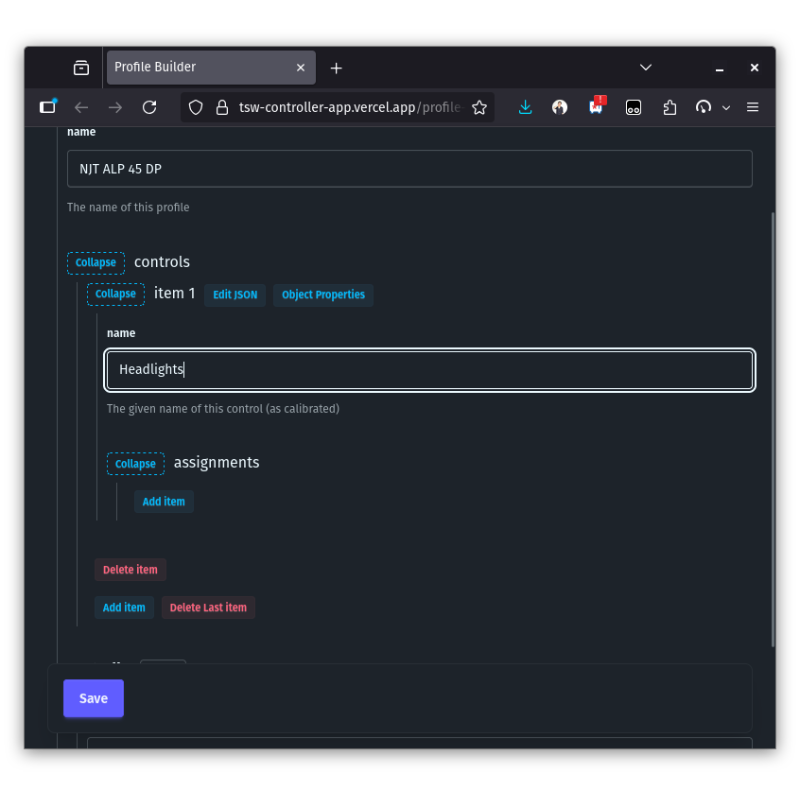
To do so, we can add a new item in the "controls" section by pressing "Add item". This will add a new control item, of which there should only be one per physically defined control. In our case we will end up having one for "Headlights" and one for "Throttle". Let's also start by entering the control name in the "name" field.
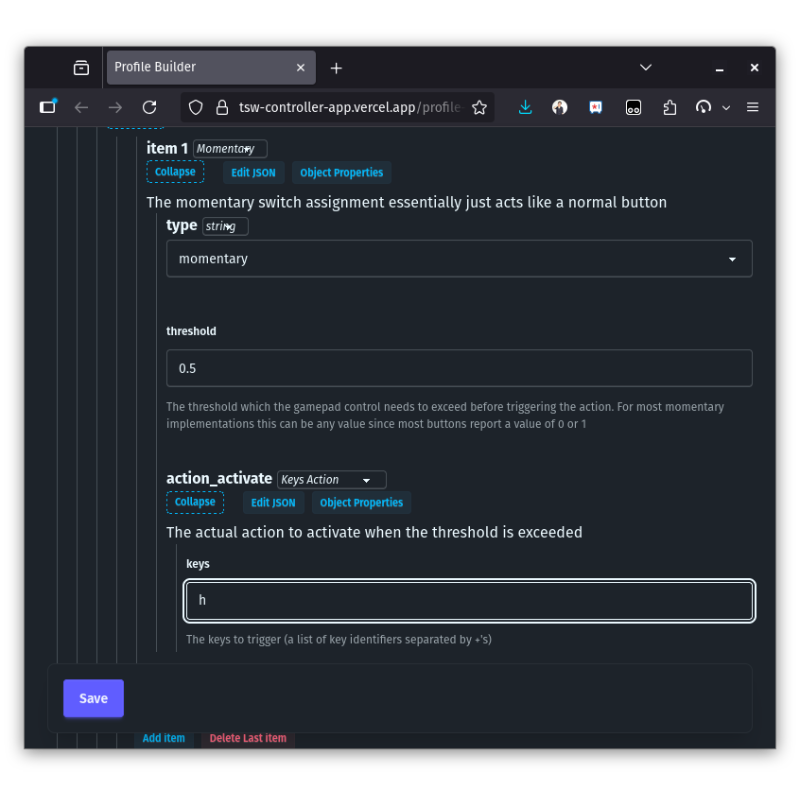
Next we can add the assignment. Each control can have multiple assignments depending on how many actions we want to take when a control is activated. For this one we will just have one simple "Momentary" assignment which will act as a momentary switch (Note: for more information on all the assignment types you can refer to the Profile Explainer later). Once you click "Add item" in the assignments section a new assignment should show up. Momentary should already be the default selected type, but if it is not make sure to select it using the select box next to "Item 1".
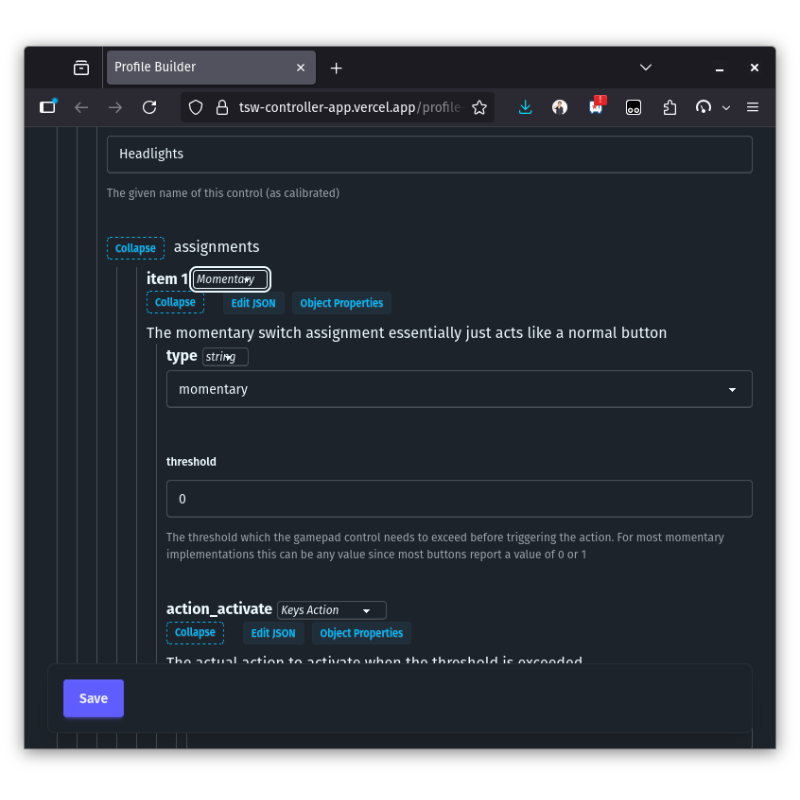
Now we can configure the momentary assignment. For the "threshold" we can simply enter any non-zero value such as 0.5. This is because all configured controls will report a value between 0 and 1 depending on their state. For levers, this is a floating value but buttons are generally either 0 or 1 so the threshold value is less important here. For the "action_activate" field we will want to make sure the "Keys Action" type is selected and we can enter h in the keys input (which is the default keybinding for headlights in Train Sim World). If you want to activate multiple keys at once you can do so by entering them separated by a + sign (eg: shift+h).
Remember: for more information on all the assignment types you can refer to the Profile Explainer
Step 4 - Creating complex assignment
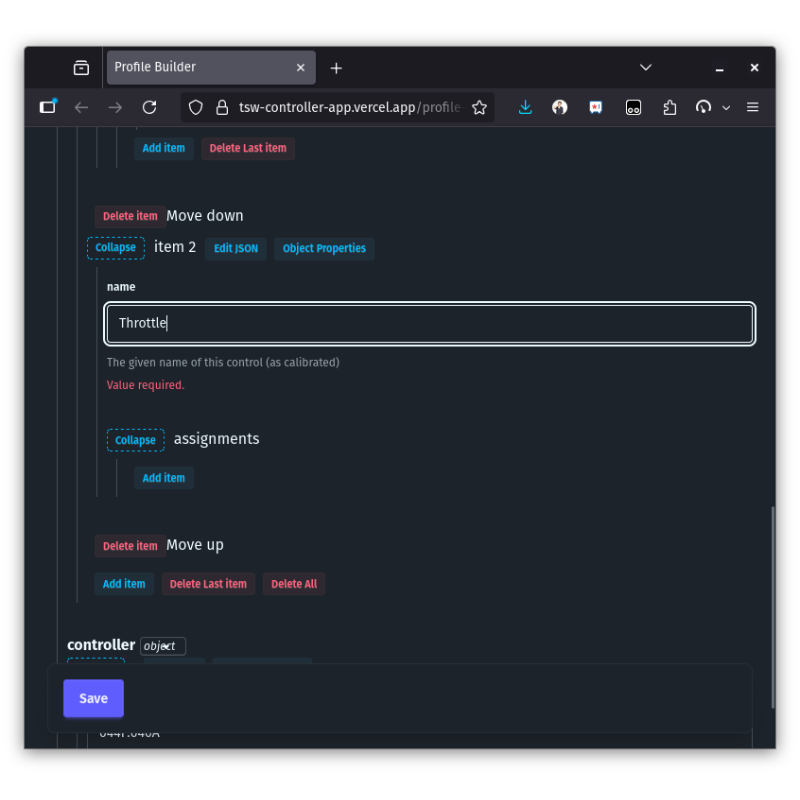
Now we can move on to the more interesting assignment type of "Direct Control" for our throttle. (this is similar to the API and sync control methods, for more information refer to the Profile Explainer). Let's start by adding another control item for our throttle and once added we will enter the previously configured "Throttle" name into the "name" input.
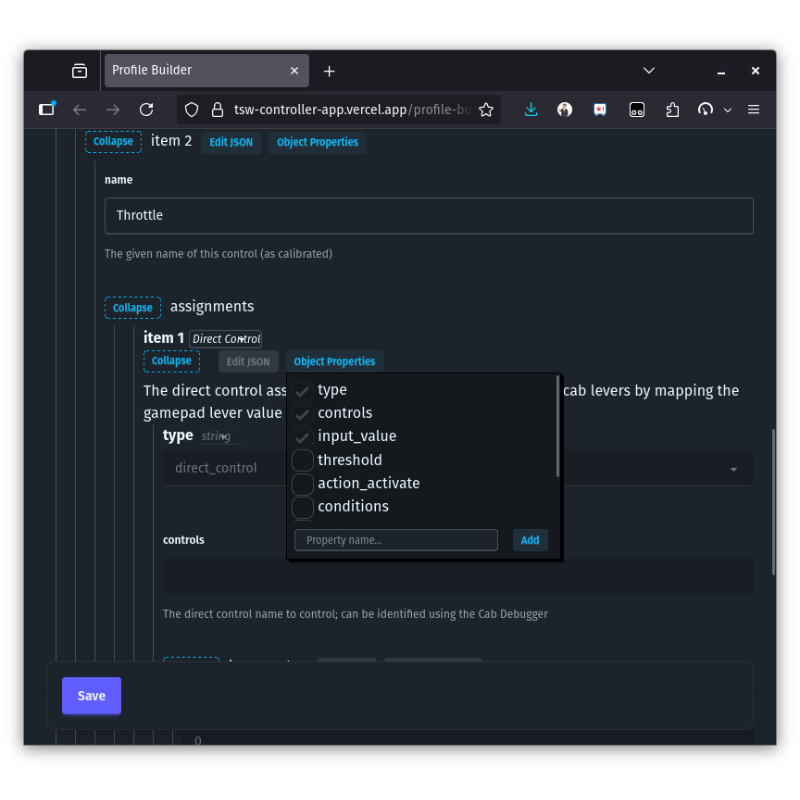
Next we can press "Add item" in the assignments section of our throttle control section, however instead of selecting "Momentary" we will select direct control. Some optional fields from the momentary assignment type may still be shown, these can be hidden/removed by selecting the "Object Properties" button and unchecking the optional fields.
In order to configure any of the three "control" assignment types we will need to launch the game since we need to use the cab debugger to figure out the actual input values of the in-game controls as well as the internal name of the control. So, launch the game, and load up the training center. From there we will spawn in the ALP-45 DP light loco and take control of the locomotive. (for the cab debugger to work you need to have taken control of the locomotive). Now you can switch the controller app to the "Cab Debugger" tab. If you have the HTTP API enabled all the available controls should show up right away. If you are not using the API, the controls will only be displayed once you interact with them. In the example below, the API is enabled and so we can see all the available locomotive controls and their current state.
Note: make sure to enable the -HTTPAPI flag in Steam before launching the game to enable the HTTP API and check that you have the API key correctly configured in the Settings tab for full functionality
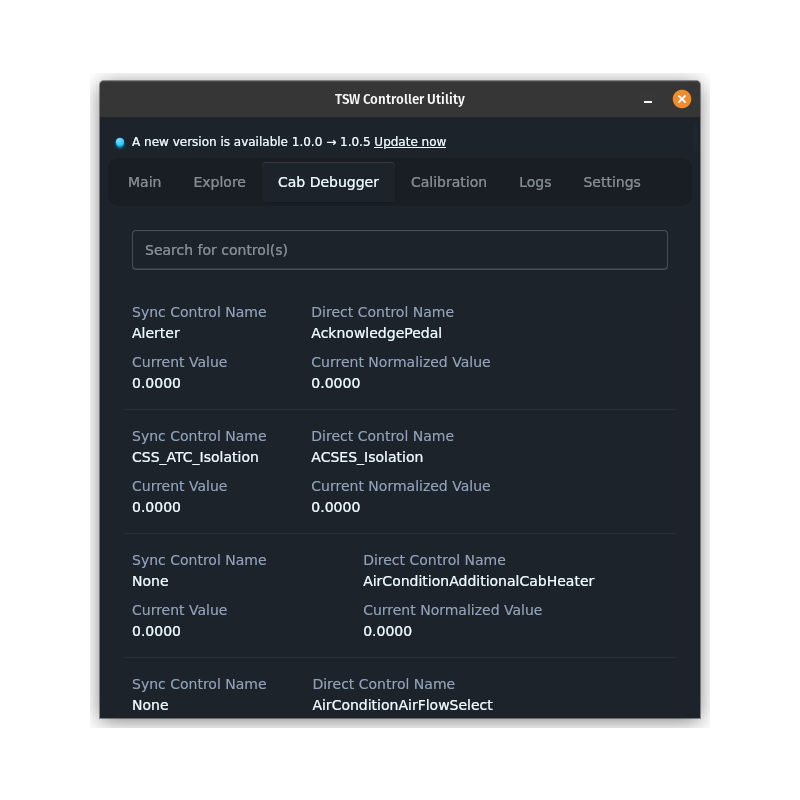
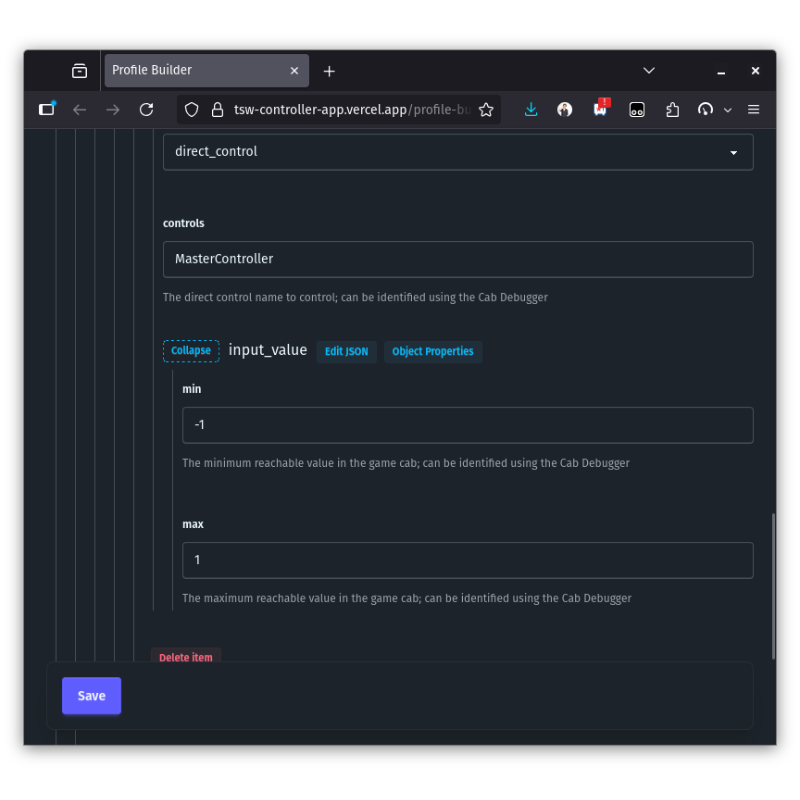
To start, lets figure out what the name of the control in-game control is. You can use the search box in the cab debugger and look for anything resembling "Master Controller", "Power", "Combined Power" or "Throttle". It can help to move the in game control so you can see the current value changing in the cab debugger. In our case, the throttle lever is called "MasterController". Let's enter that in the "controls" field of the direct control assignment. (tip: in direct control mode if the control name looks like "Throttle_F" or "Throttle_B", you can enter "Throttle_{SIDE}" instead. This will internally select the right cab side control depending on the driver direction)
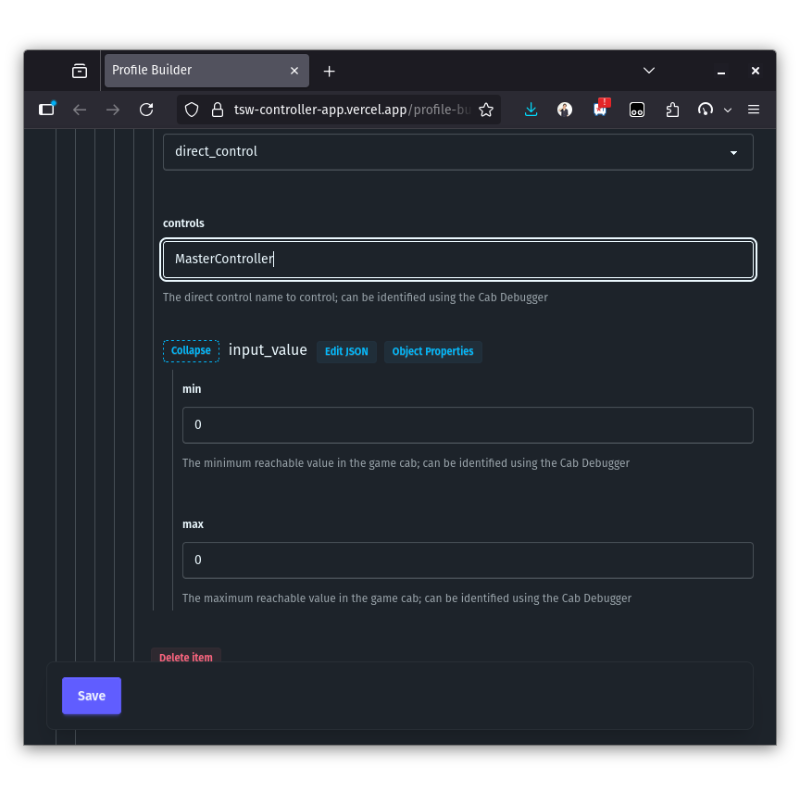
Now find out the values of the master controller in the game. Start by moving the handle to the full brake position, we will assume this is the minimum possible value. Once the value is updated in the cab debugger we can enter it in the "Min" field for the assignment. Next, you can do the same for the maximum power position and copy the value into the "Max" field. In the case of the ALP-45 DP this ends up being -1 and 1 respectively.
Remember: for more information on all the assignment types you can refer to the Profile Explainer later
Step 5 - Save and import the profile
Now we are ready to save this basic profile - so you can press "Save" in the profile builder. This will allow you to save the .tswprofile file onto your device. Once saved you can switch back to the "Main" tab in the controller app and click "Import profile" and select the previously saved profile file. After importing you will be able to select the new profile from the dropdown for your controller.

That is all, you can now use the controller with your new profile!